

WIP
 1June 15, 2017Fuselage parts
 2June 15, 2017Clear parts
 3June 15, 2017Frame A
 4June 15, 2017Frame B
 5June 15, 2017Frame C
 6June 15, 2017Frames E and G
 7June 15, 2017Seat parts prior to assembly
 8June 15, 2017Kit seat assembled
 9June 15, 2017Engine exhausts assembled
 10June 15, 2017Engine exhausts assembled
 11June 15, 2017Cockpit and seat painted, drybrushed and detail painted
 12June 15, 2017Seat with etch seatbelts and ejection handle added
 13June 15, 2017Seat with etch seatbelts and ejection handle added
 14June 15, 2017Seat with etch seatbelts and ejection handle added
 15June 16, 2017Strange protrusions on upper surface
 16June 16, 2017Strange protrusions on upper surface
 17June 25, 2017There were ejector pin marks on the inside of the intakes. These were sanded smooth prior to assembly.
 18June 25, 2017Intake lips were also thinned prior to assembly. There being no front end engine detail and intake trunking this work may all have been in vain as I might make some intake blanks like those on my Tornado
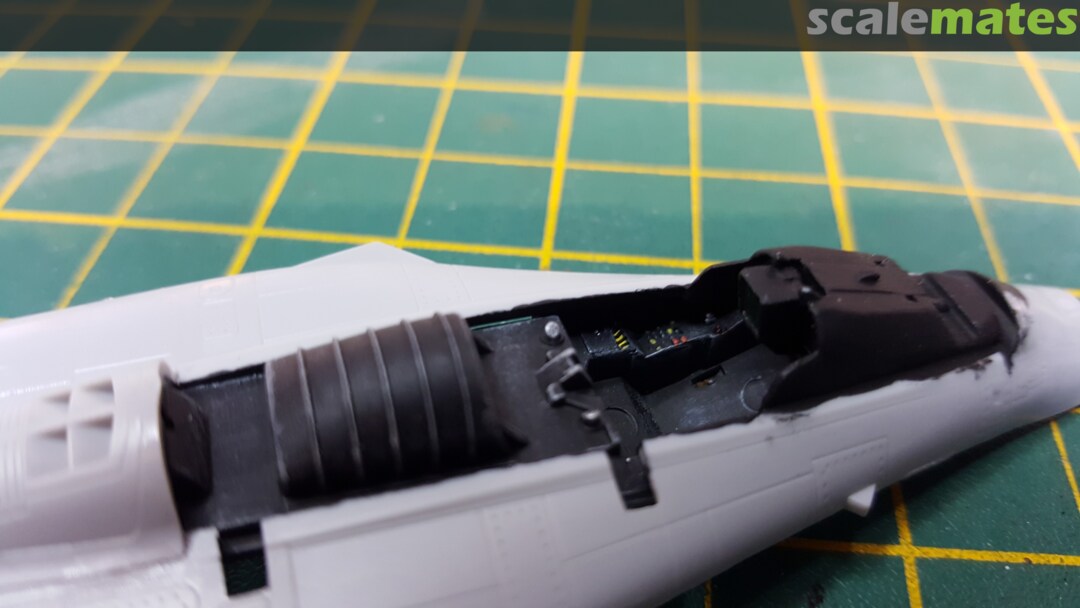
 19July 11, 2017Cockpit fitted
 20July 11, 2017View of cockpit from the other side
 21July 11, 2017Drop tanks assembled and cleaned up
 22July 11, 2017Another view of drop tanks
 23July 11, 2017Pylons for the drop tanks with wire pins fitted to help secure the drop tanks
 24July 11, 2017Main wheels assembled. Unusual for them to be in two halves these days!
 25July 11, 2017Main undercarriage bay.
 26July 11, 2017Main undercarriage bay primed in black and then a light grey misted on to create some shading
 27July 11, 2017Details in main undercarriage bay painted
 28July 25, 2017Main undercarriage bay fully painted and with a wash added in the recesses.
 29July 11, 2017The nosewheel bay needed some filler and sanding to make a smooth joint. Time spent on this area will be well spent. Thanks Ricardo for the heads up!
 30July 11, 2017Nosewheel bay received the same treatment as the main bay.
 31July 11, 2017Another view of the nose bay. You can just see the buddy refuelling pod in the background.
 32July 11, 2017Nosewheel bay details painted. Not necessarily accurate but it adds some interest.
 33July 25, 2017Main undercarriage bay fitted along with the undercarriage legs. A good strong method of securing the legs. However, strange in that they can't be fitted prior to or after fitting the bay. They have to be inserted through the fuselage into the bay.
 34July 25, 2017Once inserted through the fuselage they can be glued into the bay and then the bay glued to the fuselage. Unusual but makes for a strong fixing.
 35August 6, 2017Fuselage halves glued together and joint cleaned up. Only a small amount of filler needed.
 36August 6, 2017Arrestor hook glued on.
 37August 6, 2017Radome added and cleaned up. Small amount of filler needed.
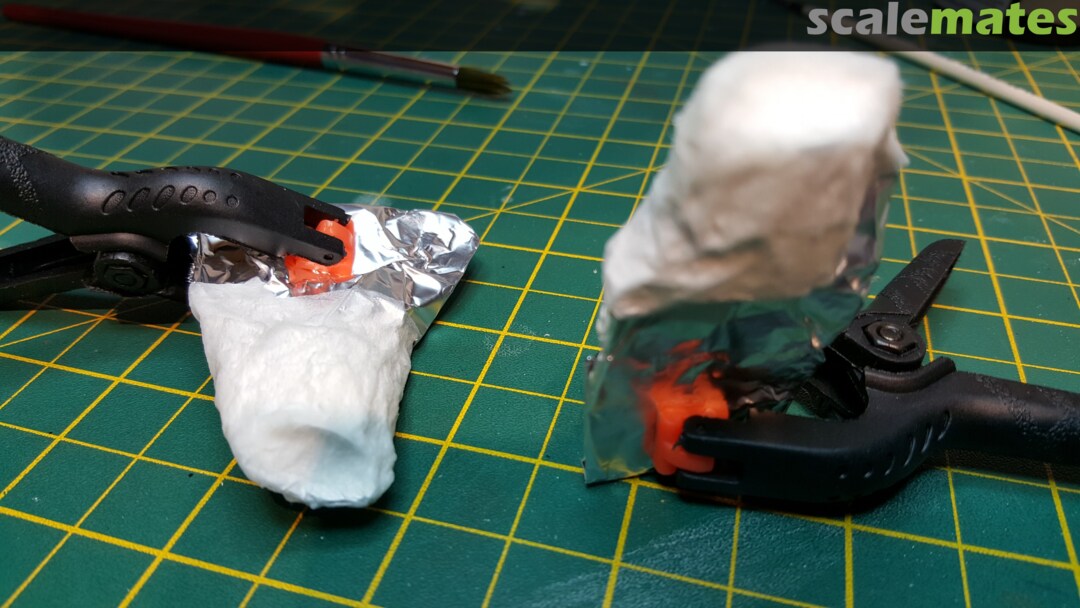
 38August 24, 2017Intake covered in foil to make intake blanks.
 39August 24, 2017Foil covered in tissue and diluted PVA glue.
 40August 24, 2017Excess foil trimmed off.
 41August 24, 2017Shape of intake blank marked out.
 42August 24, 2017Intake blank trimmed to final size and test fitted.
 43August 24, 2017Couple of coats of red and they look the part.
 44August 24, 2017Test fitted to model.
 45August 24, 2017Another view of blanks test fitted.
 46August 24, 2017And one more for good measure.
 47August 24, 2017View of intakes fitted which required a fair amount of filler.
 48August 24, 2017Another shot of the fitted intakes.
 49August 24, 2017
 50September 21, 2017Fuselage ready for priming
 51September 21, 2017Parts ready for priming
 52September 21, 2017Parts ready for priming
 53September 21, 2017Parts ready for priming
 54October 6, 2017Fuselage primed in white and black pre-shading added.
 55November 5, 2017Fuel tanks primed in white and black pre-shading added.
 56October 6, 2017Missiles and buddy pod sprayed white.
 57October 6, 2017Fuel tanks sprayed with Xtracrylic XA1133 Neutral Grey FS16270.
 58October 6, 2017Fuselage sprayed with Xtracrylic XA1133 Neutral Grey FS16270.
 59October 6, 2017Another shot of the fuselage.
 60October 6, 2017Close up of the fuselage.
 61October 21, 2017Fuselage glossed ready for decals
 62October 21, 2017Underwing tanks glossed ready for decals
 63October 21, 2017Decals going on
 64November 5, 2017National Insignia over sprayed with well thinned base colour to tone them down.
 65November 5, 2017Engine exhausts weathered and dirtied.
 66November 5, 2017Starting to panel line the fuselage.
 67November 5, 2017One side done.
 68November 5, 2017Upper surfaces weathered.
 69November 5, 2017Lower surfaces weathered
 70November 5, 2017Engines and foreplanes added.
 71November 5, 2017Starting to attach the final parts.


Commentaires
15 June 2017, 19:40
Hi Oleg. I used the AK Paneliner set for grey and blue camouflage. Worked really well.
8 November 2017, 16:35
Project info
79 images

1:72
Complété


Dassault Rafale M
Flottille 12F 2
grey