

MiG-21 F-13 "red 809" Polish Air Force - Revell 1/72


Comments
59 11 June 2022, 15:29
Welcome, Oliver!
My new project has now officially started 🙂 I decided to go with Revell's MiG-21 F-13 kit, despite there being a newer and - as I have heard - better version from Modelsvit. However, the Revell is of some sentimental value to me. It was one of the most anticipated new toolings from Revell back in 2004/2005 when I worked for a few weeks as an intern at Revell Germany in Bünde. It's almost curious that so much time has passed since then and now the Revell kit is "old" and surpassed by an even better offering from another manufacturer.
2 11 June 2022, 15:44
Wow, I love the MiG-21. Following for sure! Almost an entire seat made of pre-painted PE, I don't think I have ever seen that before. Cool!
12 June 2022, 08:19
Thank you guys! It almost hurts that l'll need to repaint the seat in the cockpit colour once it's finished. Unfortunately the small printed-on stencils will therefore be lost. Perhaps my spares box has some fitting replacement decals to offer.
12 June 2022, 09:52
Following too!
As a small note (maybe you are not that far yet and likely you knew it already), the MiG-21F-13s never had the cockpit in that Turqoise colour by default as suggested by the Eduard PE set. All F-13s and PFMs had a dark-grey interior when leaving the factory and only those overhauled by the guest country might have had variations or eventually repainted much later in turqoise...but I have no idea which countries did that. I've heard for example that the Hungarian F-13s might have been repainted in a very bright green in the cockpit shortly after delivery (not 100% sure if true).
When Eduard designed this PE set, they probably didn't do their research well.
Btw, I had the same PE set some 2 years ago and I remember the pain with the almost full PE ejection seat 🙂).
13 June 2022, 06:05
And a short comment about the Modelsvit kit because you mentioned it: it's a disaster, DON'T buy it! Check my review here at the bottom of this page:
MiG-21F-13 (ModelSvit 72042, 1:72)
and some photos from the build process (the first kit in many years I threw in the trash on purpose):
MiG-21F-13 - Vietnam | Album by Redicus (1:72)
")
The MiG-21F13 from Modelsvit is a short run and in terms of quality has nothing to do with their great Mirage kits.
Or also check this second review here which comes to the same conclusion:
themodellingnews.com..scale-build.html?m=1
The Revell kit with all of it's flaws is still by far the best MiG-21F-13 in 1:72 and you did the right choice, provided that you replace or correct the nose of course. Yes, the Revell kit is missing a lot of details, the Modelsvit kit has much nicer cockpit and landing gear, but overall none of these are relevant when you have to completely rescribe the fuslage and parts of the wings because of excessive sanding and puttying. It feels like scratchbuilding all along with the Modelsvit and it really kills the mood if you don't know it's THAT kind of kit beforehand.
3 13 June 2022, 06:12
Thanks for the heads up, Marius! I wasn't aware that the fit of the Modelsvit kit was so bad!
Yes, I already noticed that the PE set's interiour colour is not correct. I believe the right colour is called A-14 steel grey.
13 June 2022, 14:59
I am a little late, but from now I will follow your build report dilligently, Bernd! 😉
21 August 2022, 14:56
Thanks Ricardo!
Progress has been very slow over the summer. But that's not the kit's fault!
Some time was used to pick the grey-blueish cockpcit colour. That's settled now as you can see in the photos.
21 August 2022, 14:56
Welcome back Bernd. And congrats on fatherhood, a BIG job. I recall not returning to the hobby for 10+ years after, so you are doing great 🙂👍
1 7 December 2025, 14:25
So, it only took me three years to update this build thread. The reason being a good one: in November 2022 my two kids were born, taking up most of Mum's and Dad's time. This weekend I now had the unique opportunity to revive my MiG build, and it felt very good. I'll have to live off that for quite a while now. After all, who knows when things will be able to continue here again...
4 7 December 2025, 14:29
Glückwunsch zu den Kindern, wie kommst du da noch zum bauen? 🙂 Der Sitz sieht aber fantastisch aus, Bernd! Cool, geht es weiter.
1 1 February, 08:31
Danke! Das klappt manchmal abends, wenn die Kinder schon schlafen und sonst nichts mehr anliegt. Also nicht all zu oft 😅
2 1 February, 08:55
What a wonderful news! Congrats, and I totally understand you, fatherhood is a big job and every moment is important! 👍🏻💪🏻
2 1 February, 08:58
Glad to see you found time to model during fatherhood. I only modeled with my wallet and in my head 😂
That said, kids and spouse do come first 👍
5 1 February, 15:00
„I only modeled with my wallet and in my head" - that's also a very good description of my modelling life in the last couple of years, Alec!
4 2 February, 08:44
Sometimes such periods happen - longer or shorter ones, like to me now, that's life 😉
3 2 February, 16:51
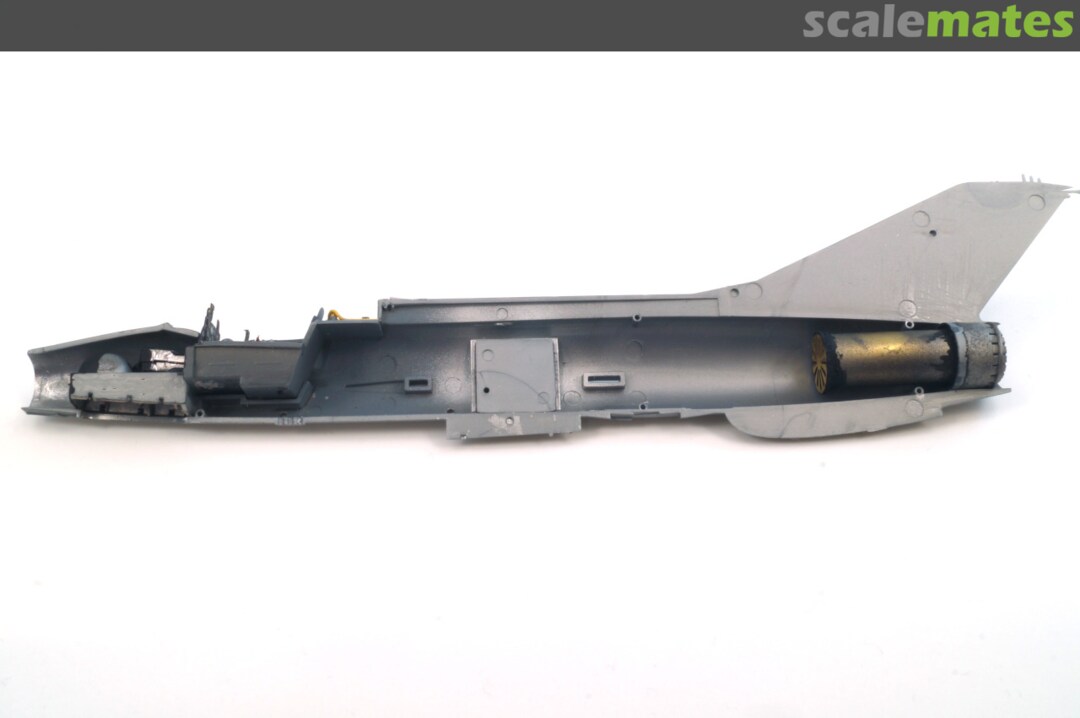
What can I say, some pieces were glued, some colour spoiled, some progress made 🙂
5 10 February, 20:05
A month has passed since the last update, and there's some progress to report. I'm now very pleased with how the intake ring looks. Anyone familiar with the original part from the Revell kit will know why.
4 13 March, 20:43
Thanks for your interest in this build! It is moving forward slowly but steady.
The story goes that when the designer of Revell's MiG-21 F13 was measuring a museum aircraft that had been jacked up, he didn't have a ladder on hand, so he didn't correctly document the contours on the upper surface of the aircraft's nose, which led to the model's well-known flaw in that area.
Is this story true or just a tall tale? Maybe I'll have a chance to ask about it at the Revell booth next weekend at the EME in Lingen 😄
4 21 March, 20:48
I'd also like to know if that story is true, Bernd. I hope you can tell us something about it 😄
Good job with the nose job 👍
3 22 March, 18:42
What can I say, Revell was at the show but every time I came across their booth they were always occupied in busy discussions. So the mystery of the botched MiG nose stays a mystery for now...
I planned to use the MiG as a testbed for Vallejo's Metal Colors. Now that I have already spent quite some time correcting the nose and other things I'm not so sure anymore about "sacrificing" the model as a test: The drop tank looks nice in Vallejo but would probably be even nicer in Alclad...
By the way - has anyone tested Vallejo's new True Metallic Metal colours with an airbrush? ChatGPT tells me they are more realistic than the Metal Color range...
4 25 April, 21:04


