

Scammell Tank transporter and Matilda tank
 1September 6, 2021Of course just when I made the radiator, Thunder models offered the (right) replacement for free.
 2September 6, 2021Bit of extra detailing of the airfilter
 3September 6, 2021yep 🙂
 4September 6, 2021Those Archer transfers come in handy. Also made a water level indicator from scratch
 5September 6, 2021A better step up
 6September 6, 2021With Milliput made some texture on the cushions. I find the wood grain greatly exaggerated.
 7September 6, 2021
 8September 6, 2021Some extra details on the brakes
 9September 6, 2021
 10September 6, 2021Those indespensable Masterclub bolts for better definition
 11September 6, 2021extra details on the firewall
 12September 6, 2021The engine does not need much extra
 13September 6, 2021But a little extra effort makes the difference
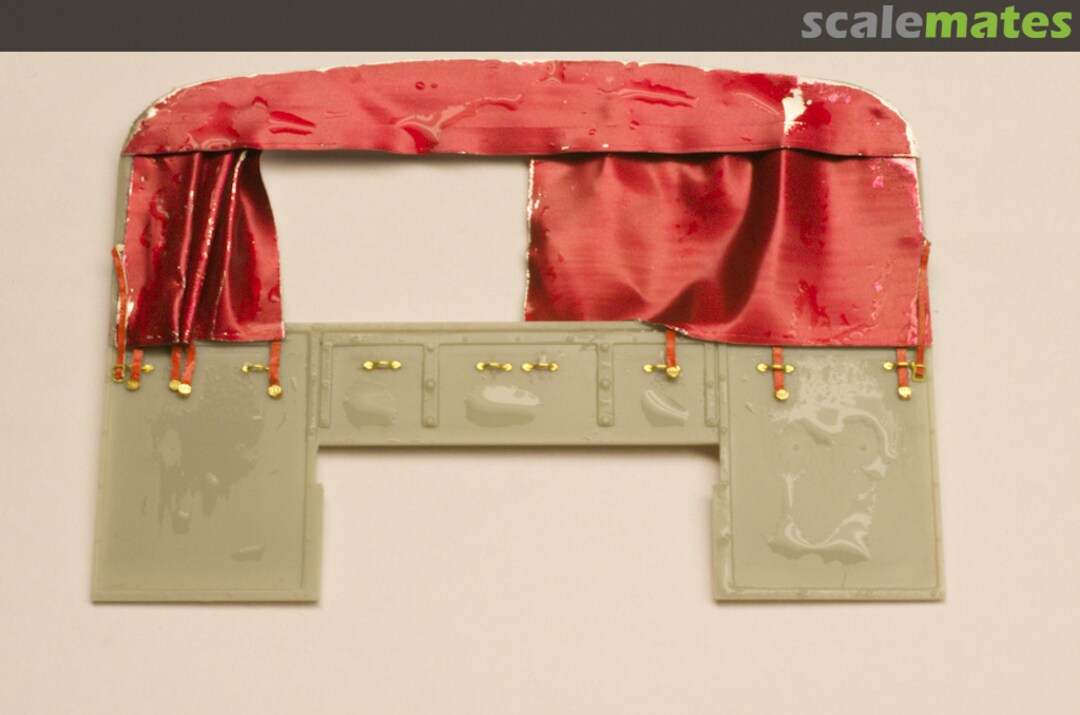
 14September 6, 2021I didn't like the supplied curtains. Made some from a wine bottle capsule. Looks like we gonna have a puppet show 🙂
 15September 6, 2021I find the supplied instrument panel to flat. Tried the Yahoo IP and found this also to flat and way to small. A little scratchbuilding created much more depth.
 16September 6, 2021Those Macro pictures show every flaw. At a normal viewing distance it looks allright to me
 17September 6, 2021After painting the engine I'm not completely satisfied, but it'l have to do 🙁
 18September 6, 2021
 19September 6, 2021Put a little light on..........
 20September 6, 2021Here you can show of a lot of interesting details. The fittings for the hose joints and the pressure lines are from Top-Studio. I detailed the (5th wheel?) with Master Club nuts and bolts.
 21September 6, 2021I used 1:24 scale Top Studio hose joints. Neat stuff
 22September 6, 2021Made a start with the trailer and some extra detailing on the brake system.
 23September 6, 2021And again those Top Studio fittings come in handy.
 24September 6, 2021
 25September 6, 2021Main brake line and Top Studio fittings.
 26September 6, 2021The Thunder Model etchings are very thin and flimsy. It's a chore working with them.
I preferred to make new racks with Evergreen styreen. A bit sturdier and good definition.
 27September 6, 2021Looks the part 🙂
 28September 6, 2021Some extra details.
 29September 6, 2021All it takes is some stock styreen for a pair of mudflaps, license plate and taillight.
I also ordered Set A153 (Tank transporter Strainer & Shackle set WW2/post war) from Accurate Armour.
 30September 6, 2021🙂
 31September 6, 2021Detailing the toolbox. For the rivets I used Archer transfers.
 32September 6, 2021
 33September 6, 2021
 34September 6, 2021
 35September 6, 2021I'm happy with the result 🙂
 36October 2, 2021Again some steps further, but still a lot of small stuff to do
 37October 2, 2021Hmmm.....I should have placed the wheels on their flat spots. The gate for the storage space is made from Evergreen Styreen.
 38October 2, 2021
 39October 2, 2021
 40October 2, 2021
 41October 2, 2021I do like the instrument panel 🙂
 42October 2, 2021I can't remember the brand of the fire extinguishers but like them very much. They are turned brass
 43October 2, 2021
 44June 2, 2022
 45June 2, 2022Detailing the auxiliary tank.
 46June 2, 2022Barely visible are the exhaust pipes going into the engine deck.
 47June 2, 2022Also here replaced the countersunk screws. And yes, I spilled thin cement over the deck 🙁 . Luckily the damage is limited.
 48June 2, 2022Fire extinguisher handles placed
 49June 2, 2022As with many older Tamiya kits there are these ugly gaps. But nothing what a little styreen can't cover up.
 50June 2, 2022The same here. You can spot the metal towing eyes under the auxiliary tank.
 51June 2, 2022Again the Master Club nuts & bolts provide extra detail.
 52June 2, 2022
 53June 2, 2022Extra details on the butt side 🙂
 54June 2, 2022Eduard etchings placed
 55June 2, 2022And more Eduard etchings.
 56June 2, 2022Remarkable that the smoke grenade launchers are made from shortened Enfield rifles.
 57June 2, 2022Belts from thin lead. The towing cables are home made from three strands of twisted copper wire.
 58October 2, 2021And then I totally forgot to take pictures of the painting proces. I think it came out rather nice but a tat to dark. Well, it just has to be like this.
It was a lot of work but I managed to angle the front terrain wheels. And it needs a flat coat. But....where did I leave the tracks??


Comments
22 July 2026, 02:05 -
Album info
The intention is to depict a scene somewhere in the East Midlands (have to decide a bit more precise where exactly) where a Scammell is salvage a Matilda tank with bad luck.

