

Schaufelradbagger under construction
 1December 17, 2016How it all began
 2December 17, 2016The Lego model
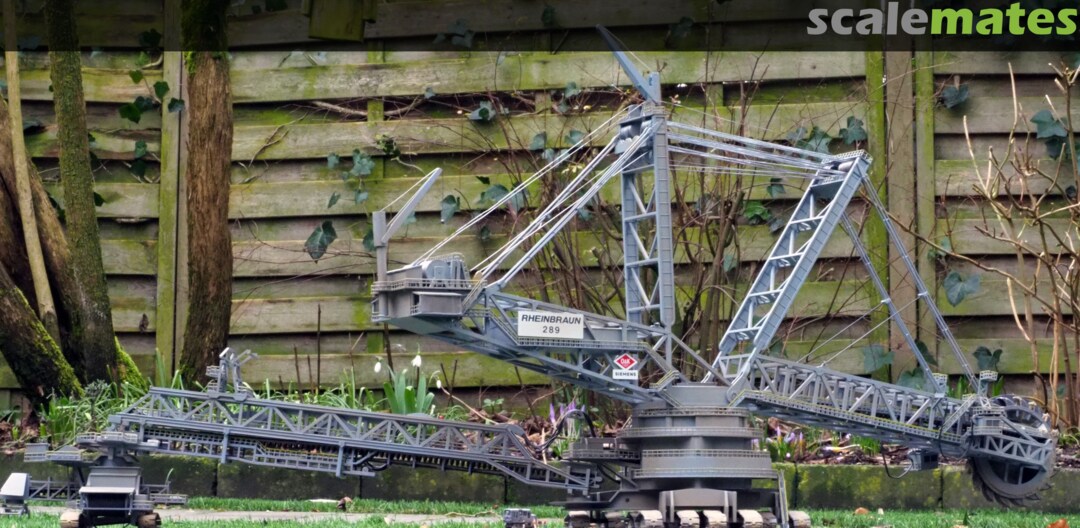
 3December 17, 2016The real one
 4December 17, 2016The big wheel
 5December 17, 2016All the parts cleaned and drying
 6December 27, 2016The first parts put together. It is quite a challenge to get the fences in place. No holes and you have to bend it to make it fit!
 7December 31, 2016Added some more railings and steps
 8December 31, 2016One of the additional buildings, meant to house one of the conveyor belts.
 9December 31, 2016Added the conveyor belt and did some weathering. Only the sand is missing!
 10January 1, 2017Finished the first three stages of the BWE. I painted it light grey, but oversprayed it with light brown. The real thing also looks very dusty and sandy!
 11January 1, 2017The conveyor belt in place, together with the connection to the main conveyor belt.
 12January 5, 2017I managed to find some 1/200 accessories: a coach, a lorry and some people
 13January 5, 2017All the parts I finished so far. In the middle a lorry to show the size of the machine!
 14January 5, 2017The winch house which moves the large wheel up and down with a lot of cables and pulleys
 15January 5, 2017On an excursion to the BWE, we were taking into the quarry by a coach on a lorry frame. I wanted to try to build this and found a coach and a lorry in the right scale. I cut the coach in pieces, opened up the windows and added seats. Look at the driver
 16January 16, 2017The instructiosn for this kit are somewhat mysterious. If you look at the instructions, near the instructions how to make stretched sprue.
 17January 16, 2017The fences and the line tell you how to make stairs with a bannister!
 18January 16, 2017I hadn't noticed that the eight struts in the third picture were not the same, but all slightly different. It was impossible to see which one should go where. So I enlarged the instructions to make it the real size and so found out which was which!
 19January 16, 2017A secret recipe for paint: mix three colours in various ratios and instructions that are absolutely incomprehensible, even for me with my 50 years of modelling experience! But look at the result, that's what counts! I love this beast!
 20January 16, 2017All the parts I've got so far. Can you spot the lorry? It's ever so small compared to the BWE. I've weathered the mainstructure, to see how I could obtain the best result. The other parts are either primer or painted grey.
 21January 21, 2017The heart of the machine: the big wheel
 22January 21, 2017The wheel in place. There are three engines to drive the wheel, although the boxart shows four engines. I added some struts to the main shield.
 23January 21, 2017The driver cabins are movable so I decided to add them at different heights.
 24January 21, 2017The other side of the arm.
 25January 21, 2017This is how the model is more or less going to look.
 26January 21, 2017All the assembled parts so far.
 27February 5, 2017Two more conveyor belts
 28February 5, 2017The main conveyor belt from the BWE to the transport conveyor
 29February 5, 2017What do you get when you have Dan Brown write the instructions for a modelkit? The instructions for the BWE! Many mysteries to solve, but it is fascinating to see it grow.
 30February 5, 2017The main conveyorbelt, temporarily connected to the mainstructure
 31February 25, 2017The first time I used a material I had never used before: sand! What else could be use to show the use of the BWE
 32February 25, 2017I used sand on the caterpillar tracks, much better than weathering with paint
 33February 25, 2017The part of the BWE where it is connected to the grid of conveyorbelts. The cables used to raise and lower the conveyor belt, still have to be attached
 34February 25, 2017The large drum with the electricity cable to power the machine
 35February 25, 2017The rear end of the conveyor belt. At first I covered the whole conveyor belt with sand, until I discovered that the sand is not dumped at the end of the belt
 36April 17, 2017Again painting lots of railings, still two frames with railings left.
 37April 17, 2017How do you get sand on the big wheel in a realistic way: let it turn in a box of sand (after applying glue, of course!)
 38April 17, 2017The result! The wheel and the conveyor belt with real sand.
 39April 17, 2017I also added some walkways with railings
 40April 17, 2017The other conveyorbelt, again with sand and additional walkway
 41April 17, 2017The main structure test fitted on is caterpillars
 42April 17, 2017This is how it's going to look in the end
 43April 17, 2017All the big parts, still unassembled
 44May 14, 2017The main tracks covered with sand, for the realistic effect
 45May 20, 2017The mainstructure on its tracks
 46May 20, 2017Stil some work to do on the piece, like adding some railings and stairs
 47May 20, 2017All parts testfitted. my workbench is almost too small!
 48May 20, 2017Look at the lorry in the same scale (1/200)
 49September 18, 2017Added a walkway on top of the cabledrums
 50September 18, 2017More stairs and walkways added
 51September 18, 2017Added the supportcables and the blocks for the big cables
 52September 18, 2017Because there is of course a lot of dust and sand, many BWEs were fitted with some kind of protection of the engines. Sometimes a large piece of plastic or something similar to that and often with metal plates, as I did
 53October 21, 2017Adding the wires to control the digger arm. It isn't easy, since the instructions are not very clear and even contradict each other. Still managed to get them in place and couldn't resist to take a picture of the complete assembly.
 54October 21, 2017The visitors are wondering about the size of the machine!
 55February 1, 2018The cables! And here it all started to go wrong. I used plasticized metal wire. It looked very realistically, but it ws impossible to get it taught. I almost gave up.
 56February 1, 2018Then I discovered basting elastic. Very flexible and strong enough to hold the weight of the big arm. And easy to paint with metal and black
 57February 1, 2018The new cables look fine
 58February 1, 2018The access stairs added
 59February 1, 2018Even from above they look nicely! It really surprised me that all the cables were so strong
 60February 1, 2018Because I thought the transport arm quite bare, I decided to add the wires and cables. I had two problems: not enough good pictures and the transport arm had to be detachable. I scratchbuilt a support, which can be removed.
 61February 1, 2018The size of the BWE compared with a DC-10 and an F-16. All in scale 1/200!
 62February 1, 2018There was a kind of support on the arm, which I added
 63February 1, 2018The signs with the serial and constructor's name in place
 64February 1, 2018A mini dio: the coach/truck with the visitors
 65February 1, 2018The cables on the transport arm, all the attachment points scratchbuilt
 66February 1, 2018A view of the whole machine. I used bluetac to fix the cables to the mainconstruction. Just a lot of weathering and the beast is finished
 67February 3, 2018After more than a year, the beast is finished! (Well almost, on the pics I saw I missed some parts while weathering with brown dirt).The main structure with a lorry-coach, bringing visititors to the quarry
 68February 3, 2018The transport arm. It contains a conveyor belt, which brings the lignite to the structure on the right. At the extreme right is the place where everything is dumped on a large network of conveyor belts.
 69February 3, 2018The big wheel, driven by three electric engines. Because they were often damaged by all the sand, they were protected by plating. These were scratchbuilt.
 70February 3, 2018The connection from the conveyorbelt to the mainstructure. There were lots of cables, bringing power to the engines. Because I wanted to make the whole a bit transportable, I used bluetac to connect the cables, so everything can be taken apart
 71February 3, 2018On the left the machines and winches that raise and lower the diggingwheel through lots and lots of cables.
 72February 3, 2018The scratchbult coach/lorry and some visitors, all in 1/200. I was so fortunate to stand in the same place and then the machine is enormous. The tracks are heigher than a man.
 73February 3, 2018Close-up of the lorry and visitors. Here you see I missed some parts, when added a brown mist to the model.
 74February 3, 2018The winches and an auxiliairy crane
 75February 3, 2018The bucketwheel with conveyor belt. I uesd real sand, used in modelrailway lay-outs! The controlcabins could move up and down in reality. And they were suspended in a way that they were always kept level. So I made this possible.
 76February 3, 2018The BWE in all its glory
 77February 3, 2018The end of all: the LEGO BWE, compared with the Revell BWE. Both beauties in their own!
 78February 4, 2018The end of the project: place of honour, in my study!
 79October 13, 2020When building this big machine, I didn't like the thread Revell provided. I found a nice plastic coated metal wire, which looked very realistically. But it was impossible to get it nice and taut. After a lot of searching, I found basting elastic and this looked the best solution! Until now. I realized that the was beginning to sink more and more and eventually the wheel rested on the ground and even the superstructure began to lean backwards. The elastic wasn't strong enough to carry the weight!
 80October 13, 2020The first thing I did to solve the problem, was fixing the arm with glue. This was quite an enterprise, because the weight of the arm is a lot and with the long arm, there is a lot of momentum. But after several efforts, the arm stayed more or less at the height I wanted. Next I replaced the top wires by the plastic coated metal wire, so if the glue wasn't strong enough, this would carry the weight. Fortunately I had used the same wire on the winches, so there was no difference to see.
 81October 13, 2020Next I needed to do something with the basting elastic. I thought I had to cut loose everything, but I found out that I hadn't glued the wire, so it was only held in place bij the paint which I put on the wires. So it was easy to shorten this: I removed more than 50 cms. But now it no longer carries the weight, it is alright to use.
 82October 13, 2020The final result: the centre of the wheel is now about 8 cms above the ground and the model looks great again!


Comments
21 July 2026, 21:11 -


