

Dragon JSU-122S/152 (Kit 6047) Build
 1January 23, 2013Filled the sponsons with plastic sheet.
 2January 23, 2013Raised the lower hull for accuracy and track clearance.
 3January 23, 2013Used plastic strip and sheet to raise the hull.
 4January 23, 2013Opening the air intakes for photo-etched screens. I didn't notice the exquisite detail until I started grinding it off.
 5January 23, 2013I was able to make it harder to open the air intakes by doing the sponson first. Should have opened the holes first. Anyway, the screens for the Tamiya kit are the same width, but about a millimeter shorter in length. Looks like I can make it work.
 6January 24, 2013Internal baffles made with plastic sheet.
 7January 25, 2013Intake baffles done.
 8January 25, 2013Axles and wire handrails on.
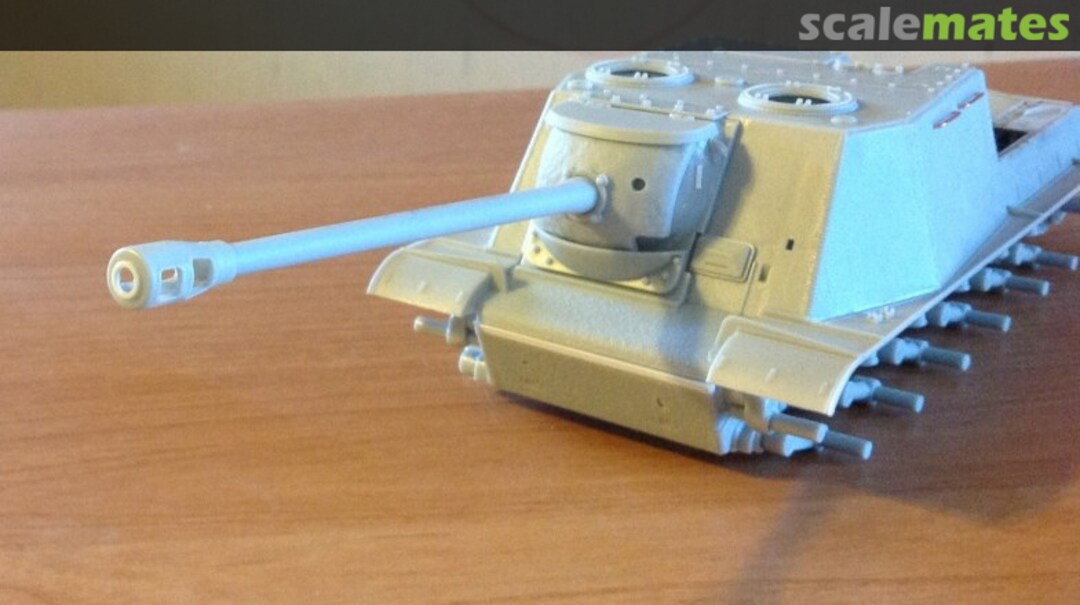
 9January 26, 2013Test fitting the gun and mantlet.
 10January 27, 2013Deepened the panel lines on the back plate, added a handle on and a rain guard over the large access door, and used a brass rod for the hinge bar.
 11January 27, 2013Attached the main sprockets. They can spin freely to aid in track placement later.
 12January 27, 2013Attaching the lower and upper hulls.
 13January 27, 2013The seams are sealed, sanded, and textured (with super glue and cornstarch slurry dabbed on with a bamboo skewer). I use silver paint to help me see any gaps.
 14January 28, 2013Starting the detail work.
 15January 29, 2013Headlight and horn using Voyager photo-etch for Tamiya
 16January 29, 2013The horn required some slicing and splicing to use the photo-etch. The "bell" is drilled out.
 17January 29, 2013Top hatches required some work to be flat bottomed, not round.
 18February 6, 2013Slowly adding bits and pieces from the Voyager photo-etch. Remember, that photo-etch is for the Tamiya JSU-152.
 19February 6, 2013The grills and wire bits.
 20February 6, 2013
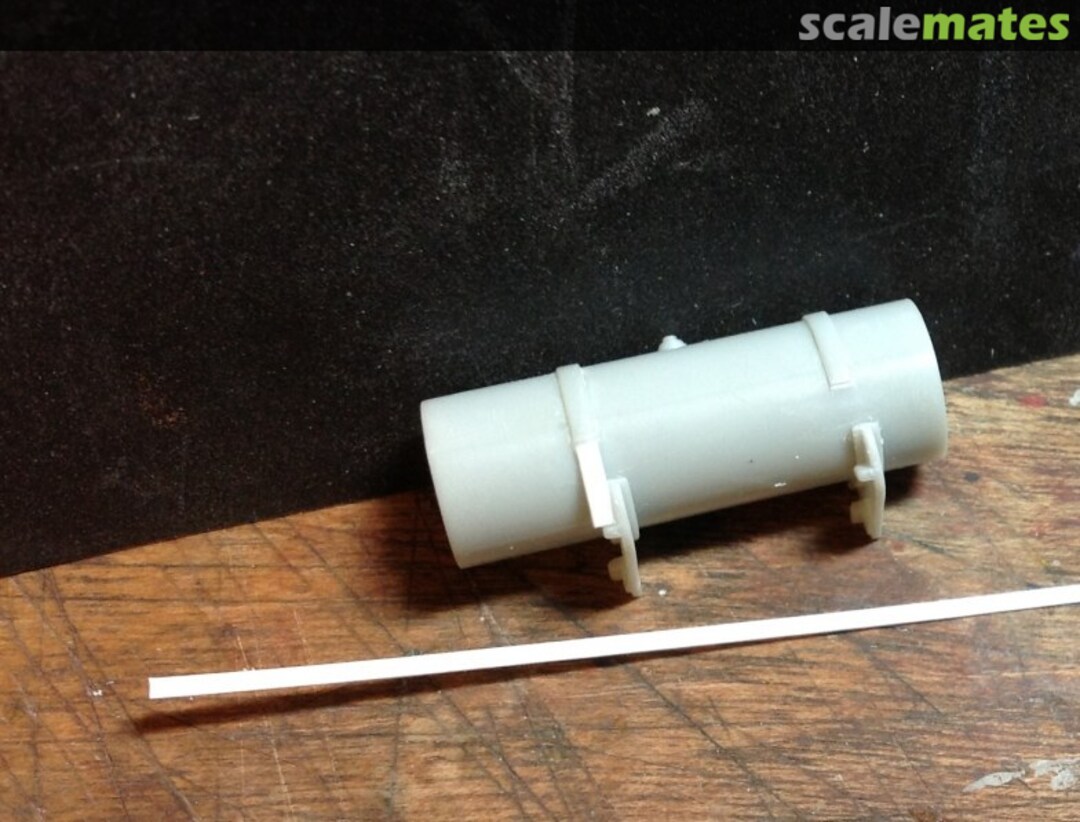
 21February 6, 2013Glued the brackets onto the fuel tanks and let them dry over-night. Notice how the straps end before they reach the brackets.
 22February 6, 2013I cut strips from sheet styrene to extend the holding straps to the brackets. Super glue, with a little corn starch, filled the gap. Then all was sanded smooth.
 23February 6, 2013Using super glue allowed the process to go quickly. Extended both the front and back straps down to the brackets.
 24February 6, 2013Applied silver paint (enamel) to help me see seams or gaps.
 25February 6, 2013Added "Grandt Line" bolts (which are used to tighten the straps on the real machine).
 26February 6, 2013Attached the tanks to the hull.
 27February 7, 2013Spare tracks "welded" on the front with Super-glue and cornstarch slurry.
 28February 8, 2013Primed with Tamiya white liquid surface primer.
 29February 8, 2013
 30February 8, 2013
 31February 8, 2013
 32February 8, 2013
 33February 10, 2013Base coat of Model Master Acryl Medium Green
 34February 10, 2013Wetted the front area and applied table salt at random to scrape off later. Painted front with Model Master Acryl Flat White
 35February 10, 2013Scraped off the salt and misted the green areas with Model Master Acryl Russian Armor Green to darken and cover any white over spray.
 36February 11, 2013Applied decals over a gloss coat. The word is "VICTORY!"
 37February 12, 2013Artist oil paint and mineral spirit wash.
 38February 12, 2013Ugly. Hope this works...
 39February 12, 2013Pin wash in some places, general wash in others. Needs to be "cleaned-up" after it drys. I will wipe the excess off with mineral spirits. I hope....
 40February 12, 2013The wash cleaned-up. I used a foam pad and Tamiya cotton swabs with mineral spirits to wipe away the excess wash.
 41February 12, 2013Completed the first dry brushing to bring out the highlights.
 42February 12, 2013More dry brushing....
 43February 12, 2013Finished the stowage and detail painting
 44February 12, 2013Spare tracks painted
 45February 12, 2013More stowage
 46February 14, 2013After applying green filter, brown pastel filter, and mud layer (real mud!)
 47February 14, 2013Ready for tracks!
 48February 14, 2013
 49February 16, 2013The tracks seem pretty nice, but it took about six hours to clean them up!
 50February 16, 2013The tracks are fitted and glued together.
 51February 16, 2013After a couple of hours of glue drying, I paint and weather the tracks
 52February 16, 2013Made them a dusty rust color, with highlights of rubbed metal (dry brushing)
 53February 16, 2013Even though the tracks are glued and dry, a little heat from a hair dryer softens the bond. Very carefully, the tracks can be threaded onto the vehicle.
 54February 16, 2013The sprockets have to be constructed so they can spin freely, or this method would be very difficult. The rest of the wheels have been glued in place, but if they could turn, it wouldn't hurt.
 55February 16, 2013Using little blasts of heat and cotton swabs allows me to mold the tracks in place as I want them.
 56February 16, 2013In a few minutes, the glue bond tightens, and you're done! I started with 89 links per side, but after wrapping around, and sagging the track, the connection point was at 83 links. I always try to connect on the bottom.
 57February 16, 2013I don't think you could use this method if the lower hull wasn't modified (raised), like I did at the beginning of this project. There would be too little clearance to thread things through!
 58February 16, 2013Next steps are touch-up paint and mud on the tracks and sprockets. Almost done!
 59February 16, 2013Finished!






Comments
22 July 2026, 10:08 -

